Sunday, June 28, 2015

Getting an amateur radio operator license in Japan (4th level)

About one year ago, I went to see the Japan Ham fair in Tokyo. Despite having studied about radio communications at University, the amateur radio (ham) world was still unknown to me.


Near the entrance there was a stage with talks about the ham world. Many of them were introductory so I listened to a few. I wanted to learn what's so fun about amateur radio that you can't do with the Internet. These are a few ways to enjoy amateur radio that I learned of at the ham fair:
  • Talking to your neighbours: a good way to make new friends.
  • Hiking a mountain and trying to get far-away signals from the top.
  • Talking to people from all around the world: I was pointed out by someone that amateur radio operators are usually well-educated people and allow for good conversation.
  • Enjoying it from a technical point of view: improve your equipment with better antennas or transceivers.

The ham fair wasn't just about introductory talks though. There were many booths organized by amateur radio fans and radio equipment sellers. In a way, it reminded me of a Makerfaire exhibition. In fact, this fair can be very convenient if you need to buy oscilloscopes, function generators or frequency counters at a low price tag.


With all the excitement, I decided that this was cool and elitist (kidding!), and that it might be worth giving it a try. I bought a book for the 4-th level (easiest) of the Japanese amateur radio operator license test, which is all you need to get started. On the spur of the moment I also bought an entry-level walkie talkie valid for the 144MHz and 430MHz bands (see other frequency bands here).


I took the test the Japanese way. That means I had to learn many Japanese technical words. In retrospective, I'm glad I went the hard way because now it's easier for me to talk about amateur radio with other Japanese fans. Note however that you can also take the exam in another country and have it validated by JARL (Japanese Amateur Radio). The test is held in several Japanese cities. If you live near Tokyo, then you are lucky because you can just show up on the test day without previous registration. Check the dates here. You just need to go to 日本無線協会 (map link) bringing with you a copy of your 住民票 (get it at your ward office), 2 photos, a pencil and the money for the exam (~5070 yen) and the operator license (~2270 yen). The test is divided in two parts: engineering and law. As I went through the book I tried to summarize most of the knowledge required in the two diagrams above. I have also prepared a cleaned-up text version here in English for you. I hope it's useful to someone. After passing the exam, on the same day, I applied for the operator license. A couple of weeks later, I got my license card by post and next I applied for the radio station license (you need two licenses: operator and station). Ok, I guess that's all for this post. Hope to see you at Japan ham fair 2015!!

Friday, June 26, 2015

Makerfaire Shenzhen 2015

Last weekend I visited Shenzhen to attend the Makerfaire. I used a low-cost airlines called Vanilla Air (20,000 yen for a return flight from Narita airport) to get to Hong Kong airport. From there I took a shared limousine car to my hotel (220 Hong Kong dollars). There are cheaper ways to go. However, this was the best choice as I would later realize that it would have been a nightmare to find my hotel otherwise.


This were the views from my hotel room (Shenzhen She & He Apartment Shenlan). The hotel was actually an apartment in a tall building. Despite its low price, the apartment was rather clean and it had a fridge and a kitchen. It's location was perfect for going to the Makerfaire on foot.


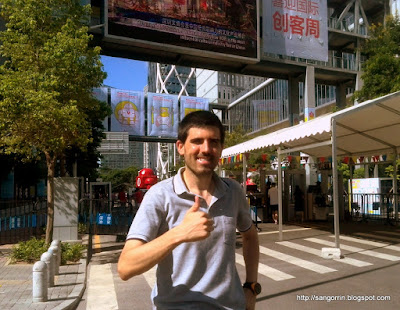
Makerfaire's location was awesomely situated among several modern buildings, and was decorated with numerous posters and maker-related objects. However, it was mostly open air so I was wondering what would happen if it started to rain. Fortunately, Shenzhen is a very sunny city and apart from a light rain on the last day we had mostly good weather.


As usual, all booths were filled with creativity and new ideas. There were booths showing hobby projects as in many other Makerfaires I've attended. Surprisingly though, there were many more booths showing already finished products. I think that that was the main difference with other Makerfaires I've been too. As a manufacturing hub, I guess that living in Shenzhen makes it easier to develop your ideas all the way to the final product. There were also big commercial booths from companies such as Seeed studio (who announced Genuino in partnership with Arduino) and Mediatek.


Once I had seen all of the booths several times, I decided to go downtown and checkout Shenzhen's electronics town. I took the subway (Shekou line) and stopped at Huaqiang North (华强北) station. Then I tried to find buildings with the name SEG or 华强电子世界 (Huaqiang electronics world) on them. There were several ones actually. Typically, the first floor is dedicated to small booths selling electronic parts, and booths on higher floors sell consumer electronics and the like.


My impressions of Shenzhen as a city were very good. It was a clean and safe city with modern buildings and department stores. There were lots of new buildings in construction so I expect Shenzhen to become one of the biggest cities on Earth in a near future. I'm sure I will be back here.

Monday, June 8, 2015

Periscope-type DVD Spectroscope (DIY spectrometer)

A few months ago I became a member (友の会) of the Japanese National Museum of Nature and Science. One of the benefits of being a member is that you have free access to the installations any time of the year. In particular, this is useful if you plan to attend seminars and workshops organized by the museum. A month ago I participated in a workshop organized by professor Fumitaka Wakabayashi. The topic of the workshop was building a periscope-type DVD spectroscope.


I was gladly surprised when I arrived at the workshop and received a folder containing: professor Wakabayashi's papers, a light map, a periodic table, and of course the materials to build the spectroscope which were:
  • The main body: made out of a sheet of card stock (the internal side should be black). The spectroscope pattern can be downloaded here.
  • A 45° (1/8) sector that was cut with scissors from a cheap DVD after heating it at 60~70°C. This is used to refract the observed light source, in a similar fashion as a prism. You can use methanol to clean the surface.
  • A 15x15mm mirror plate (available at Tokyu hands with the name ミラープレート) or alternatively an acrylic mirror.
  • Double-side sticky tape: used to fixate the mirror and DVD onto the main body.

The way the spectroscope works is very simple. The light whose spectrum we want to measure enters through a slit (a very thin hole) into the spectroscope, and gets reflected in our mirror. Then it travels towards the DVD sector, where the light gets refracted. On the viewing window we can install a camera (e.g.: your smartphone's camera) in order to capture the spectrum of the light.


For instance, this is the spectrum of a Toshiba FHC34ED-Z lamp as captured from my smartphone's camera.


To analyze the picture, we can use the software ImageJ following the next steps:
  • Image>Transform>Rotate: straight up the image so that it is horizontal (or vertical). You can check the "preview" checkbox for an interactive manipulation. Also, make sure that blues (lower wavelength) are on the left (or top) of the picture.
  • Select a thin rectangle with the rectangle tool
  • Analyze>Plot profile (Ctrl-k, or Ctrl-Alt-k if the image is vertical): a intensity graph appears.
  • Click copy and paste the data in libreoffice calc or excel
  • Convert pixels to wavelength(nm) by identifying well-known wavelengths (e.g.: 404.6565nm, 435.8335nm, 546.75nm, 576.961nm, 579.067nm). You can do this with Analyze>Calibrate in ImageJ or with a spreadsheet/script able to calibrate the wavelength of the spectroscope.

Finally, you can check your lamp's catalog and compare the spectrum you got and the one measured at the factory.


There are other ways to create a simple spectroscope. For example, I built the one above using a chips box and a linear diffraction grating sheet from Edmund optics during another session at the Japanese National Museum of Nature and Science.

Reference papers:
  • Fumitaka Wakabayashi, Kiyohito Hamada, A DVD Spectroscope: A Simple, High-Resolution Classroom Spectroscope, J. Chem. Educ., 2006, 83 (1), p 56.
  • Fumitaka Wakabayashi, Resolving Spectral Lines with a Periscope-Type DVD Spectroscope, J. Chem. Educ., 2008, 85 (6), p 849.

Saturday, June 6, 2015

Arduino Oscilloscope

Recently I found at instructables.com a tutorial that explained how to create a simple oscilloscope with Arduino: Girino. I decided to build it and learn all I could in the process. This post contains a few learned lessons that will hopefully be useful to other Girino builders. First, these are the specs of the oscilloscope I built:
  • Board: Arduino Duemilanova (ATmega168)
  • Input voltage range: -2,5..2,5V (0..5V without level shifter)
  • Resolution: 8bit/sample
  • Maximum sampling freq: 153.8 Ksamples/s
  • Samples/trigger: 512 samples
  • Pinout
    • pin 3 (PWM): used to generate a PWM signal that gets filtered and serves as the threshold for the trigger to work.
    • pin 7 (V- of analog comparator): connected to the threshold signal (the PWM signal after the filter)
    • pin 6 (V+ of analog comparator): connected to the input signal after offset level and buffering. When V+ is greater than V- it generates an interrupt.
    • pin A0 (analog input 0): also connected to the input signal.
The amount of samples per trigger can be improved by using an Arduino UNO (ATmega328) which has double SRAM size (2KB) allowing you for 1280 samples/trigger.


The sampling frequency is calculated from the equation above. In my case, the clock's frequency was 16Mhz although it can be upgraded to 20Mhz. The division factor (prescaler in the code) values go from 2 to 128 (in powers of 2). And the amount of cycles it takes for the Arduino's analog-to-digital converter to acquire one sample is 13 cycles. The default value for division factor is 128, which results in a sampling frequency of 9.6 KSamples/s.


Before I started building Girino, I decided to simulate the amplification and threshold circuits with LTSpice for which I already organized a workshop in the past. You can find the corresponding simulation files here. For the simulation, I added some clamping diodes to protect the input of the operational amplifiers (opamp). I also added an extra opamp to the level shifter in order to decrease its output impedance.


Next, I decided to use a universal PCB board for creating the Arduino shield. For the design of the universal PCB board, I used a program called PASS which is available in Japanese. I used a very convenient universal PCB board from aitendo that has the perfect size and configuration for building Arduino shields. For that reason, I had to create my own board's drawing for PASS. You can find all the PASS design files here. Looking backwards, PASS's usability was rather bad and I wasted quite a lot of time re-drawing the same lines over and over. Next time, I will create my own PCB boards with Kicad. Note: it seems that another person already created his own PCB for a Girino-based oscilloscope.


After designing the board layout with PASS, I checked that all components actually fitted in. For that, I used a piece of styrofoam to insert the leads of each component. Notice that I simplified the original Girino's circuit by hardwiring the jumpers to what I judged to be the best solution.


As I explain in my notes, a universal PCB board is a matrix of holes and pads. The main 4 methods to join pads are solder bridges; jumper wire; naked wire; and using the leads of the components.


Once you finish wiring, it's a wise thing to double check with the help of a digital multimeter that connections are as you expected and there are no shorts.


And this is the result. I got those BNC connectors from aitendo. Unfortunately, it turned out that one of them was broken. It took me some time with the multimeter to find out.


Let's focus now on the software. The diagram above shows briefly the behaviour of the software that goes into the Arduino board. You can download the software here. It is the same software as the one released by the author, but with a few patches added (check the git log). A detailed explanation of the software is included in my notes. If you use an ATmega328, change the buffer size to 1280 bytes. The arduino software contains an interface that can be accessed through the serial port. For testing that the software and hardware are working correctly, open the Arduino serial monitor and introduce commands such as (see Girino.ino):
  • d: displays the oscilloscope parameters (baudrate, threshold, trigger event..)
  • p: change the prescaler settings (eg: p8 for a division factor of 8)
  • t: change the threshold settings

Finally, for the host software (frontend) I selected Girinoscope. I had to modify the buffer to 512 bytes for my board (leave it untouched if you have an ATMega328), check the patched software here. Building and running it just requires two instructions:

$ ant build
$ ant run

Conclusions: while building the Girino oscilloscope I learned about protection circuitry; reviewed circuit simulation with LTSpice; learned how to use PASS for creating the layout of an universal PCB board and how to wire it. Finally, I learned a lot about the detailed settings of an Arduino's program: interrupts, fast PWM, analog comparator or ADC tuning registers to name a few.

How to backup your stuff with rsync

As many other people, I have a USB hard disk (let's call it UPDATED) where I store some of my data organized through a hierarchy of folders (docs, notes, projects and the like). A very simple but effective way to keep your data safe is to buy another USB hard disk (let's call it OUTDATED) of the same or greater size and synchronize it from time to time. Personally, I like this flow:
  • Create the data (e.g.: a text file) and leave it in my Linux desktop PC.
  • When I feel that some of that data contains important information, I save it into the UPDATED disk. Also, I move the data into a folder called RECORDED (in my PC) just to know that I already saved it.
  • Sometimes I like re-organizing my UPDATED hard disk so that things are easier to find or to make sure that folder names are coherent.
  • Finally, from time to time (usually every few months) I synchronize the so-called OUTDATED hard disk so that it perfectly mirrors the UPDATED disk.
The last step is the most involved so I use the rsync tool. This tool is quite dangerous so I suggest to start by defining the paths to the UPDATED and OUTDATED hard disks, and making sure they are not the other way around:

export UPDATED=/media/4BF0-F436_/
export OUTDATED=/media/4BF0-F236/


Next, run rsync in simulation (dry) mode in order to check which files will be deleted (or updated):

$ rsync -vanu --delete $UPDATED $OUTDATED | grep deleting

After making sure that everything is as you wanted, apply it for real:

$ rsync -vau --delete $UPDATED $OUTDATED

The options I am using here are:
  • -v verbose mode
  • -a archive mode (preserves owner, timestamps, etc)
  • -u skip files that are newer in OUTDATED (if there were)
  • -n dry-run (to try without doing)
  • --delete deletes files from OUTDATED that are not in UPDATED
There are many other ways to backup your data (automatic, encrypted, or online to name a few), but I feel comfortable with this one because of its simplicity.