This October I participated in the 8th minikiyakon plastic model contest organized by Kiyahobby, one of the most well-known plastic model shops in Japan. This time the topic was Tamiya's recently released 1/35 US Tank Destroyer M10.
For comparison you can see what other people presented here, here, here and here. Our plastic models also appeared on the Armour Modelling magazine, one of the most famous plastic modelling magazines in Japan. You can see the final winners here. Unfortunately I didn't win anything but being a beginner I wasn't expecting it either. Participating in the contest was good as motivation.
This time I did the stretching beforehand. Stretching is useful to prevent your paper from buckling when you paint with watercolours. The process isn't too complicated: wet your paper with a sponge or a paint roller and wait for about 10 minutes. Your paper will expand. Then, use gummed craft paper tape to fix the wet paper to a board. The gum in the paper tape is activated by water. Make sure you use a thick board that doesn't bend easily. Finally, wait 24 hours for the paper to dry and stretch. Check out this video if you have any doubts.
You want to use an application for extracting the major lines from the photo you are about to trace. For example, you can use the pencil sketch effect from the tool Paint.net. Print the result and trace it into your watercolour paper with a pen. I always use a red pen because it makes it easier to see what lines I've already traced.
This time I skipped the grayscale layer and applied colour directly. I started with the lighter tones and then progressively I applied darker ones.
This is the final result. I'm not satisfied yet, but I learned a few things. For example, I think that next time I should try to simplify the tracing part. Note that I cheated and removed a few tracing marks from her face with the computer.
Last night, it was my 10th time going to a life drawing session since I started this Summer. Here is a selection of my art from each session (in chronological order). Each time I tried a different approach just for the sake of challenging myself and having fun. So far I've tried with ink, poster colours, oil painting, watercolours, and pastels. There are long pose sessions (1 or 2 hours) and short pose sessions (20', 10', 5', 3').
I joined a meetup in August and hiked the Nishizawa valley (西沢渓谷 - Nishizawa Keikoku) which is famous for its 7 waterfalls. You can find some Japanese leaflets scanned here and here.
We met at 8:15 AM at Enzan station (JR中央本線 塩山駅) and took a bus (山梨交通) towards the bus stop 西沢渓谷入口バス停 from where we started the hike. You can see my GPS log on Google Earth for a detailed description of the route. If you want to take your own I suggest using the "Easy GPS logger" application on your smartphone. It produces a .gpx file that you can read from Google Earth.
The hike was really pleasant. Most of the route goes through a forest along a river with wonderful waterfalls. Definitely a nice mountain to try in Summer.
You'll also have the chance to cross a hanging bridge. Nothing to be scared of!. After the hike, we went to a Japanese hot spring (onsen) for a relaxing bath. Finally, I had some grapes from this region (Yamanashi prefecture) and went back home by train.
One of the advantages of language learning is that it gives you access to literature that wasn't available to you before. For example, I learned a lot from reading Ken Morita's book 誰でもたちまち絵がうまくなる「トレース水彩画」入門 (Anyone can quickly become a good painter, "Trace Watercolour Painting" introduction) on Kindle unlimited.
If you can't read Japanese, check out his Youtube videos. They are mostly self-explanatory. Let's try and follow Morita's procedure.
First, you trace a picture into watercolour paper. It's important that you use quality tracing paper. I tried with cheap tracing paper and it didn't work well. If you can afford it I suggest buying Pilot's carbon plastic paper. The watercolour paper should have no texture, the smoother the better.
Next, use black ink and water to paint it in grayscale. Painting in grayscale first makes the process easier because you can focus on the lights and shades without having to think about the colours at the same time. It's important that the ink you use becomes waterproof when it dries. I suggest Pilot's ink or any other ink brand used by comic artists.
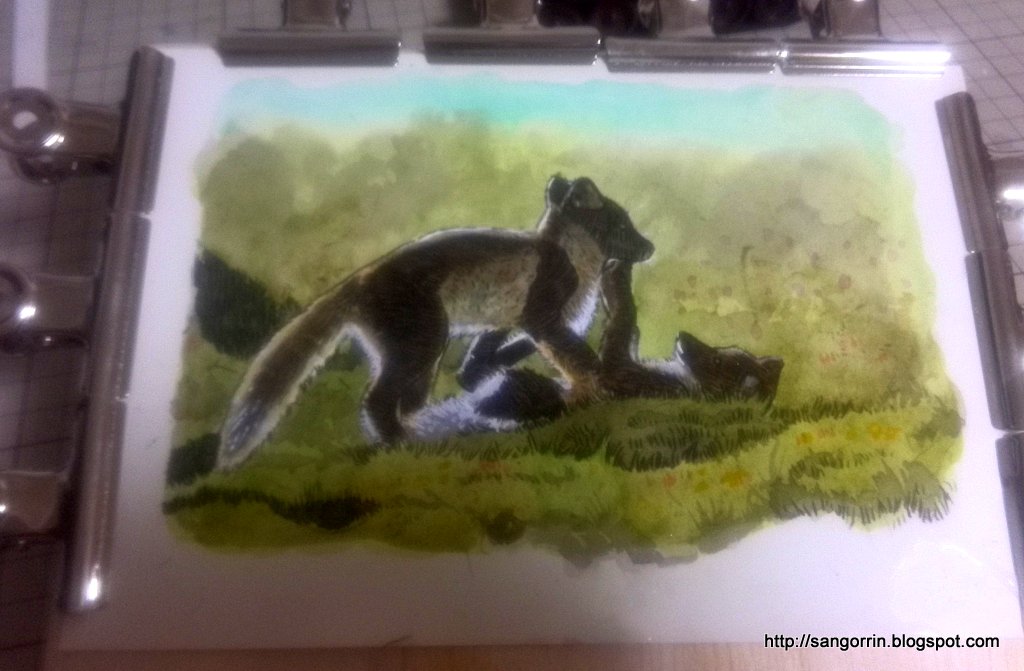
Once the grayscale layer dries, start applying the watercolours. Begin with light colours, then apply darker colours, add a shade colour (e.g. purple) and finish with a white poster colour (gouche) for the highlights. I suggest using a watercolour pan set (I use the Petit color 48 pan set) instead of tubes, it's much easier. Once the colour layer dries stretch the paper by thoroughly soaking it with tap water (don't worry, the watercolours will not go away with the water) and using a set of binder clips. Note that you can do this before painting as well by using gummed watercolour paper tape.
And there you go, this is the result. Probably I should have simplified the lines and chosen brighter colours, but I felt this method really made watercolour painting easier and faster. I didn't talk about more advanced techniques such as masking. I encourage you to watch Morita's videos and explore them by yourself.


 . Information on this blog is provided "as is" without warranty of any kind, either expressed or implied.